一、基础编译
linux(ubuntu)、git、python2、全志v3s、5寸电阻触摸屏(RGB屏)、USB TO UART
1、安装python2
1 | sudo apt-get update # 更新源 |

2、安装交叉编译器与工具链
1 | gcc-arm-linux-gnueabihf |
gcc-arm-linux-gnueabihf 安装
链接: https://pan.baidu.com/s/1VjjnR4zSwde1HUAbgcg64A?pwd=4jbn 提取码: 4jbn 复制这段内容后打开百度网盘手机App,操作更方便哦
1 | tar xvf gcc-linaro-6.3.1-2017.05-x86_64_arm-linux-gnueabihf.tar.xz # 解压 |
device-tree-compiler 安装
1 | sudo apt-get install device-tree-compiler # 使用 apt-get 安装 |
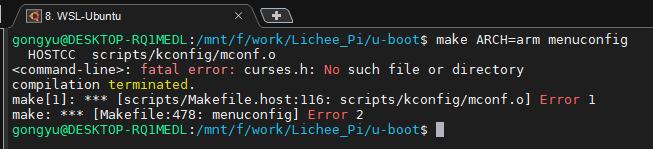
libncurses5-dev 安装
1 | sudo apt-get install libncurses5-dev |
3、下载u-boot源码并编译
下载 u-boot
1 | # 使用 git 从 github clone 下来荔枝派官方u-boot v3s主线分支 |
u-boot 目录结构
1 | ├── api 存放uboot提供的API接口函数 |
编译 u-boot
1 | cd u-boot # 打开 u-boot 目录 |

1 | make ARCH=arm menuconfig # 打开配置菜单对u-boot配置 |
配置完u-boot后再编译
编译完成后,在当前目录下生成了 u-boot-sunxi-with-spl.bin ,可以烧录到8K偏移处启动。(tf卡)
二、u-boot 配置
命令执行:make ARCH=arm menuconfig 使用菜单形势配置u-boot
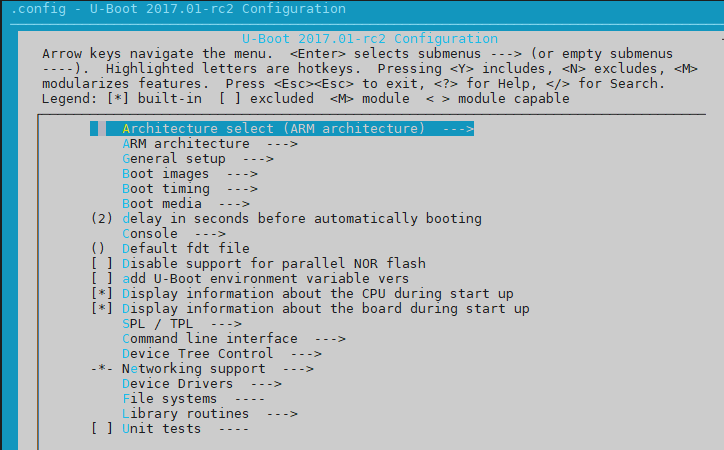
1、简单配置
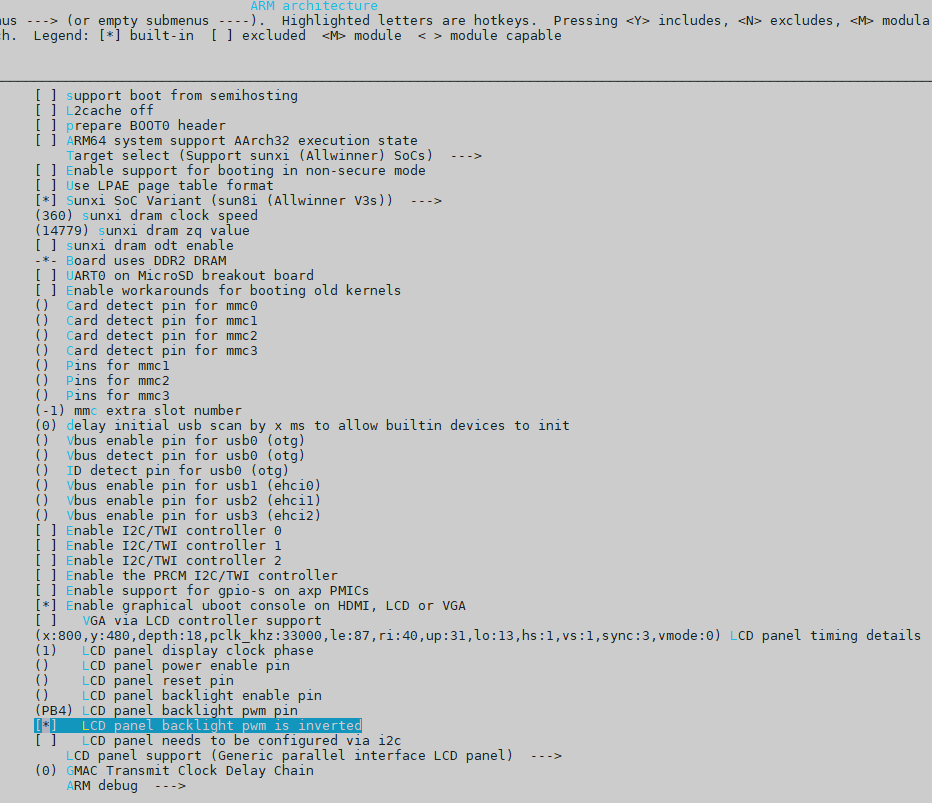
Architecture select 架构选择 选择arm架构
ARM architecture arm架构配置 lcd配置 ddr配置 芯片选型 等
Boot images cpu时钟配置 等
delay in seconds before automatically booting uboot开机的时候等待时间 默认为2s
SPL / TPL 外设配置
Device Drivers 设配驱动配置
2、配置 SPI Flash
由于目前Uboot环境变量固定存放在1MB位置之内,所有留给uboot的空间固定到flash前1MB的位置不变。每个分区的大小必须是擦除块大小的整数倍,XT25F128B的擦除块大小是64KB。
| 分区序号 | 分区大小 | 分区描述 | 地址空间及分区名 |
|---|---|---|---|
| mtd0 | 1MB | spl+uboot | 0x0000000-0x0100000 : “uboot” |
| mtd1 | 64KB | dtb文件 | 0x0100000-0x0110000: “dtb” |
| mtd2 | 4MB | linux内核 | 0x0110000-0x0510000 : “kernel” |
| mtd3 | 10MiB 960KiB | 根文件系统 | 0x0510000-0x1000000 : “rootfs” |
2.1、配置 u-boot 支持 Nor Flash
荔枝派 zero 上面焊接了一个 芯天下 的 Nor Flash 型号为:XT25F128B 16MByte。
需要将 u-boot 切换到 v3s-spi-experimental分支下
make ARCH=arm menuconfig 打开u-boot菜单配置
在 u-boot 配置下选择自己对应的 SPI Flash 对应的芯片厂商
XT25F128B 与 Winbond 公司的 w25qxxx 系列的 flash 兼容性很高 所以选中 Winbond SPI flash support
1 | Device Drivers ---> |
2.2、配置 uboot 默认环境变量对Nor Flash的支持
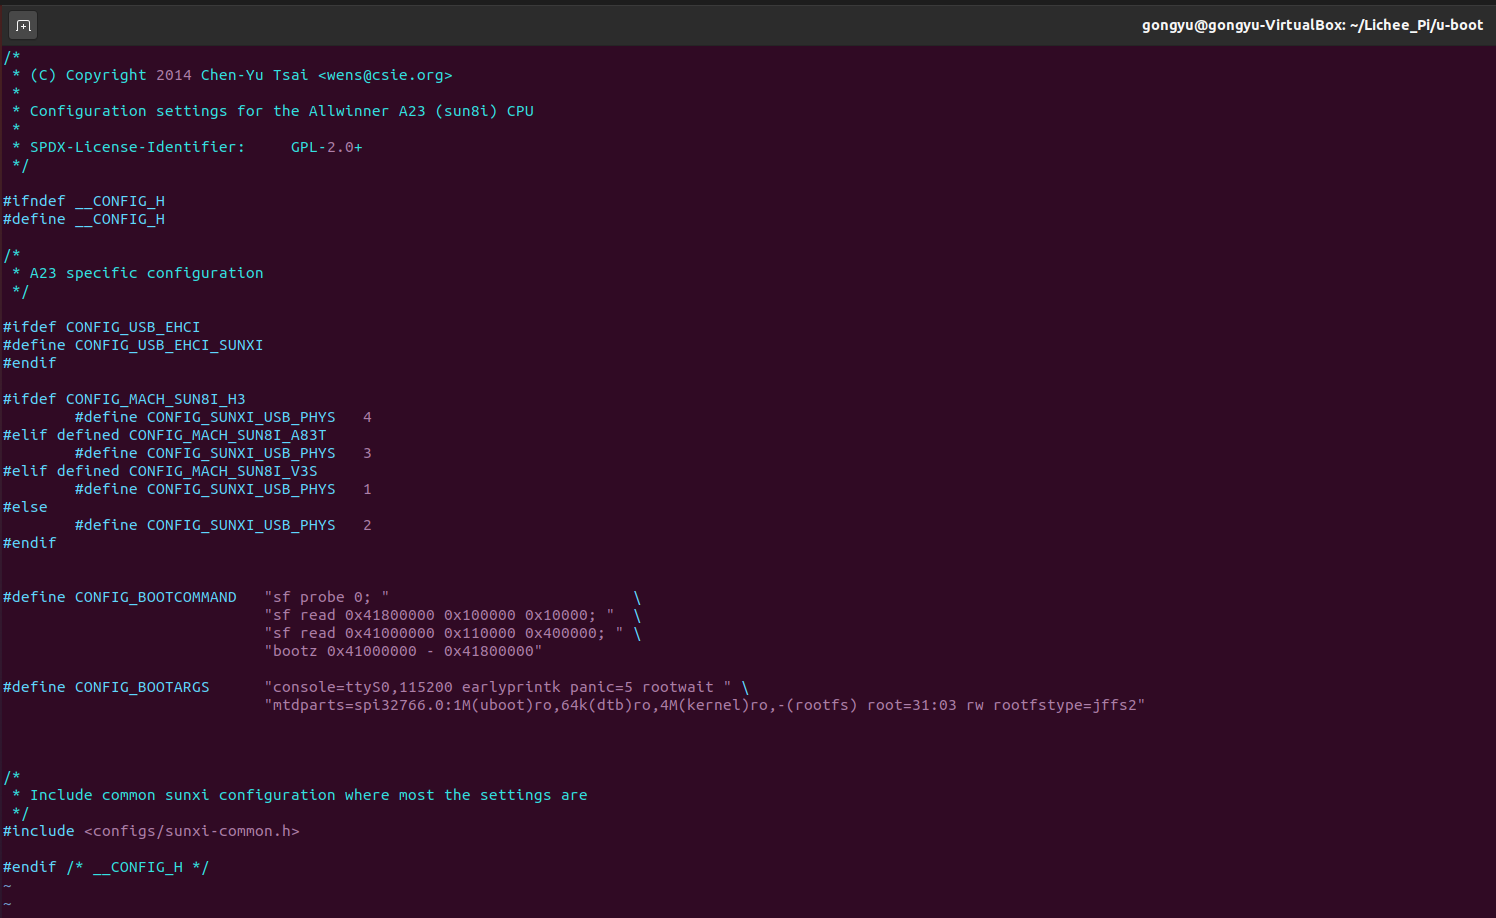
在 include/configs/sun8i.h 中添加 CONFIG_BOOTCOMMAND 和 CONFIG_BOOTARGS 环境变量设置
命令:vim include/configs/sun8i.h 在 #include <configs/sunxi-common.h> 前面添加以下代码
1 |
|
1 | // 如果需要在LCD上也显示日志 加入 console=tty0 |
如果需要USB输入显示在LCD交互上,请在系统启动成功后修改 vi /etc/inittab
1 | # console::respawn:-/bin/sh # 注释掉原有的console 加入如下两行 |
(1)、环境命令解析:
sf probe 0;初始化 Flash 设备 (CS 拉低)sf read 0x41800000 0x100000 0x10000;从 Flash 0x100000 (1MB) 位置读取 dtb 放到内存 0x41800000 偏移地址。如果是 bsp 的 bin, 则是 0x41d00000 偏移地址。sf read 0x41000000 0x110000 0x400000;从 Flash 0x110000 (1MB + 64KB) 位置读取 dtb 放到内存 0x41000000 偏移地址。bootz 0x41000000 - 0x41800000启动内核 0x41000000 内核地址;0x41800000 dtb 地址。
(2)、启动参数解析:
console=ttyS0,115200 earlyprintk panic=5 rootwait在串口0输出信息 115200 波特率mtdparts=spi32766.0:1M(uboot)ro,64k(dtb)ro,4M(kernel)ro,-(rootfs) root=31:03 rw rootfstype=jffs2spi32766.0 是设备名,后面是分区大小,名字,读写属性。root=31:03表示根文件系统时 mtd3;jffs2 格式。
2.3、配置 spi id
暂时不配置spi id,将uboot烧录到v3s中也可以运行,只是串口会输出错误信息,屏幕正常显示 log 和uboot版本信息
1 | Hit any key to stop autoboot: 0 |
(1)、修改uboot spi_flash.c 文件
先查找错误位置 vim drivers/mtd/spi/spi_flash.c
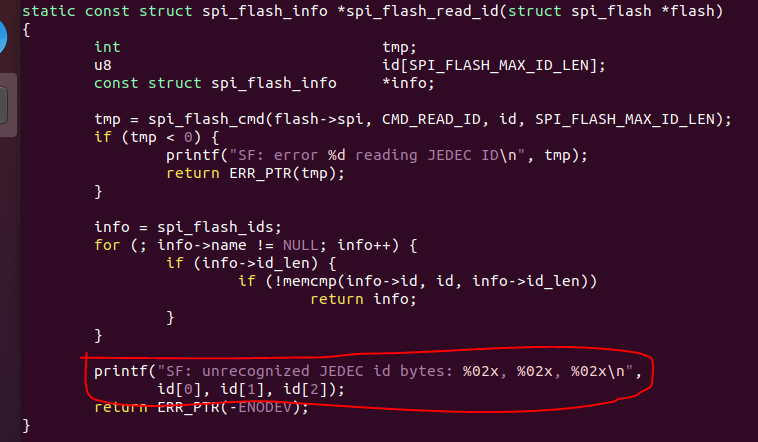
添加XT25F128B SPI Flash id 到 spi_flash_ids.c drivers/mtd/spi/spi_flash_ids.c
由于需要移植的 flash 芯片特性和 w25qxxx 系列的 flash 相似,所以可以直接复制过来,修改后如下{"xt25f128b", INFO(0x0b4018, 0x0, 64 * 1024, 256, RD_FULL | WR_QPP | SECT_4K) },
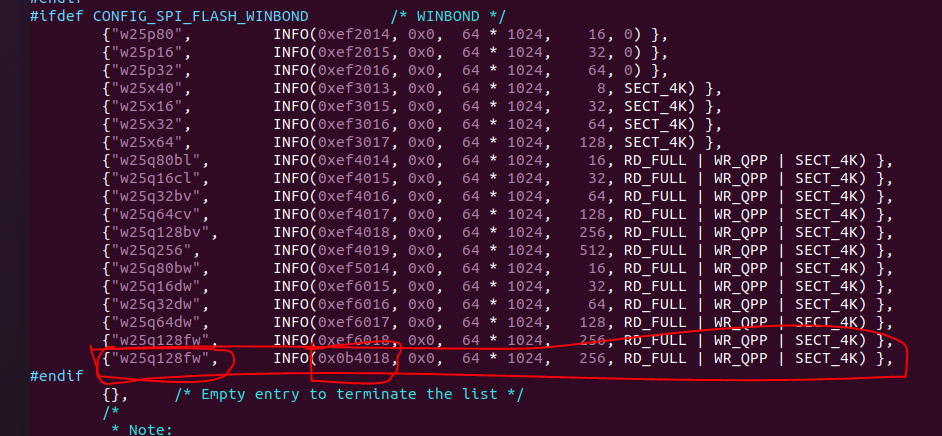
0x0b4018 是uboot报错的id SF: unrecognized JEDEC id bytes: 0b, 40, 18
1 | # 配置数据格式如下 |
(2)、重新编译uboot 并烧录
三、u-boot SPI Flash 烧录
1、全志 sunxi-tools 烧录工具安装
1.1、安装
1 | # 安装依赖包 |
安装时可能会报错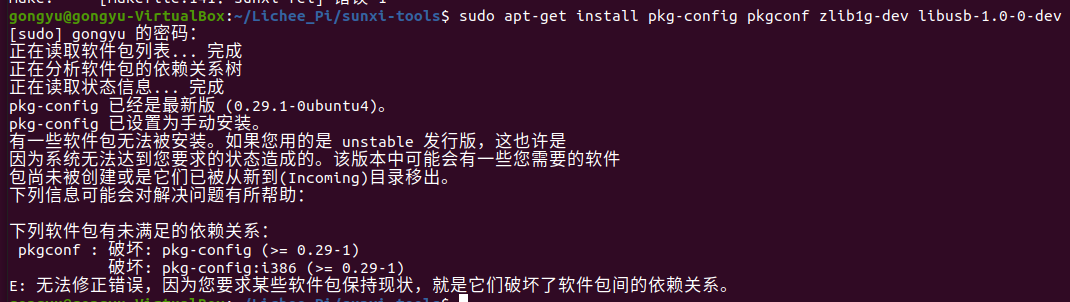
好像 pkg-config 要后面装1
2
3
4sudo apt-get install pkgconf
sudo apt-get install zlib1g-dev
sudo apt-get install libusb-1.0-0-dev
sudo apt-get install pkg-config
1 | # 获取源码 |
1.2、基础用法
1 | # 列出所有芯片的信息: |
2、进入 FEL 模式使用 sunxi-fel 工具烧录 (全志专用工具)
- TF卡和 spi flash 都没有可启动的镜像
TF卡空或者不插,spi flash 内容为空,上吊就会自动进入 fel 下载模式
- TF卡中有进入FEL模式的特殊固件
el-sdboot.sunxi如果 spi flash 有启动镜像,那么需要在 TF 卡中烧录一个 sunxi 提供的启动工具,那么插入该 TF 卡上电会进入 fel 模式;
命令:
dd if=fel-sdboot.sunxi of=/dev/mmcblk0 bs=1024 seek=8
- 上电时将 SPI_MISO 引脚拉为低电平
该引脚为
boot引脚,上电时如果检测到该引脚为低电平就会进入 fel 下载模式。
3、准备烧录uboot(SPI Flash)
1 | //检查是否可以探测到芯片信息: |

3.1、烧录到 RAM 中执行,以 uboot file-with-spl 形式运行(单次运行,测试使用)
1 | sudo sunxi-fel uboot u-boot-sunxi-with-spl.bin |
3.2、烧录到 SPI Flash (烧录完成后重新上电)
1 | sudo sunxi-fel -p spiflash-write 0 u-boot-sunxi-with-spl.bin |
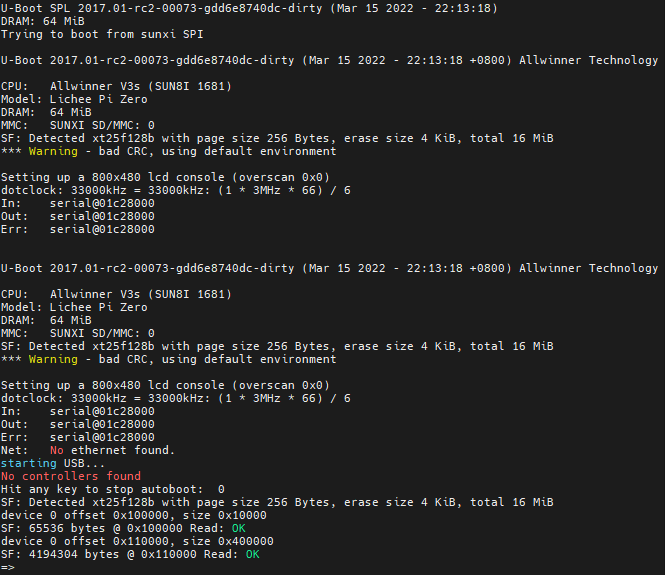
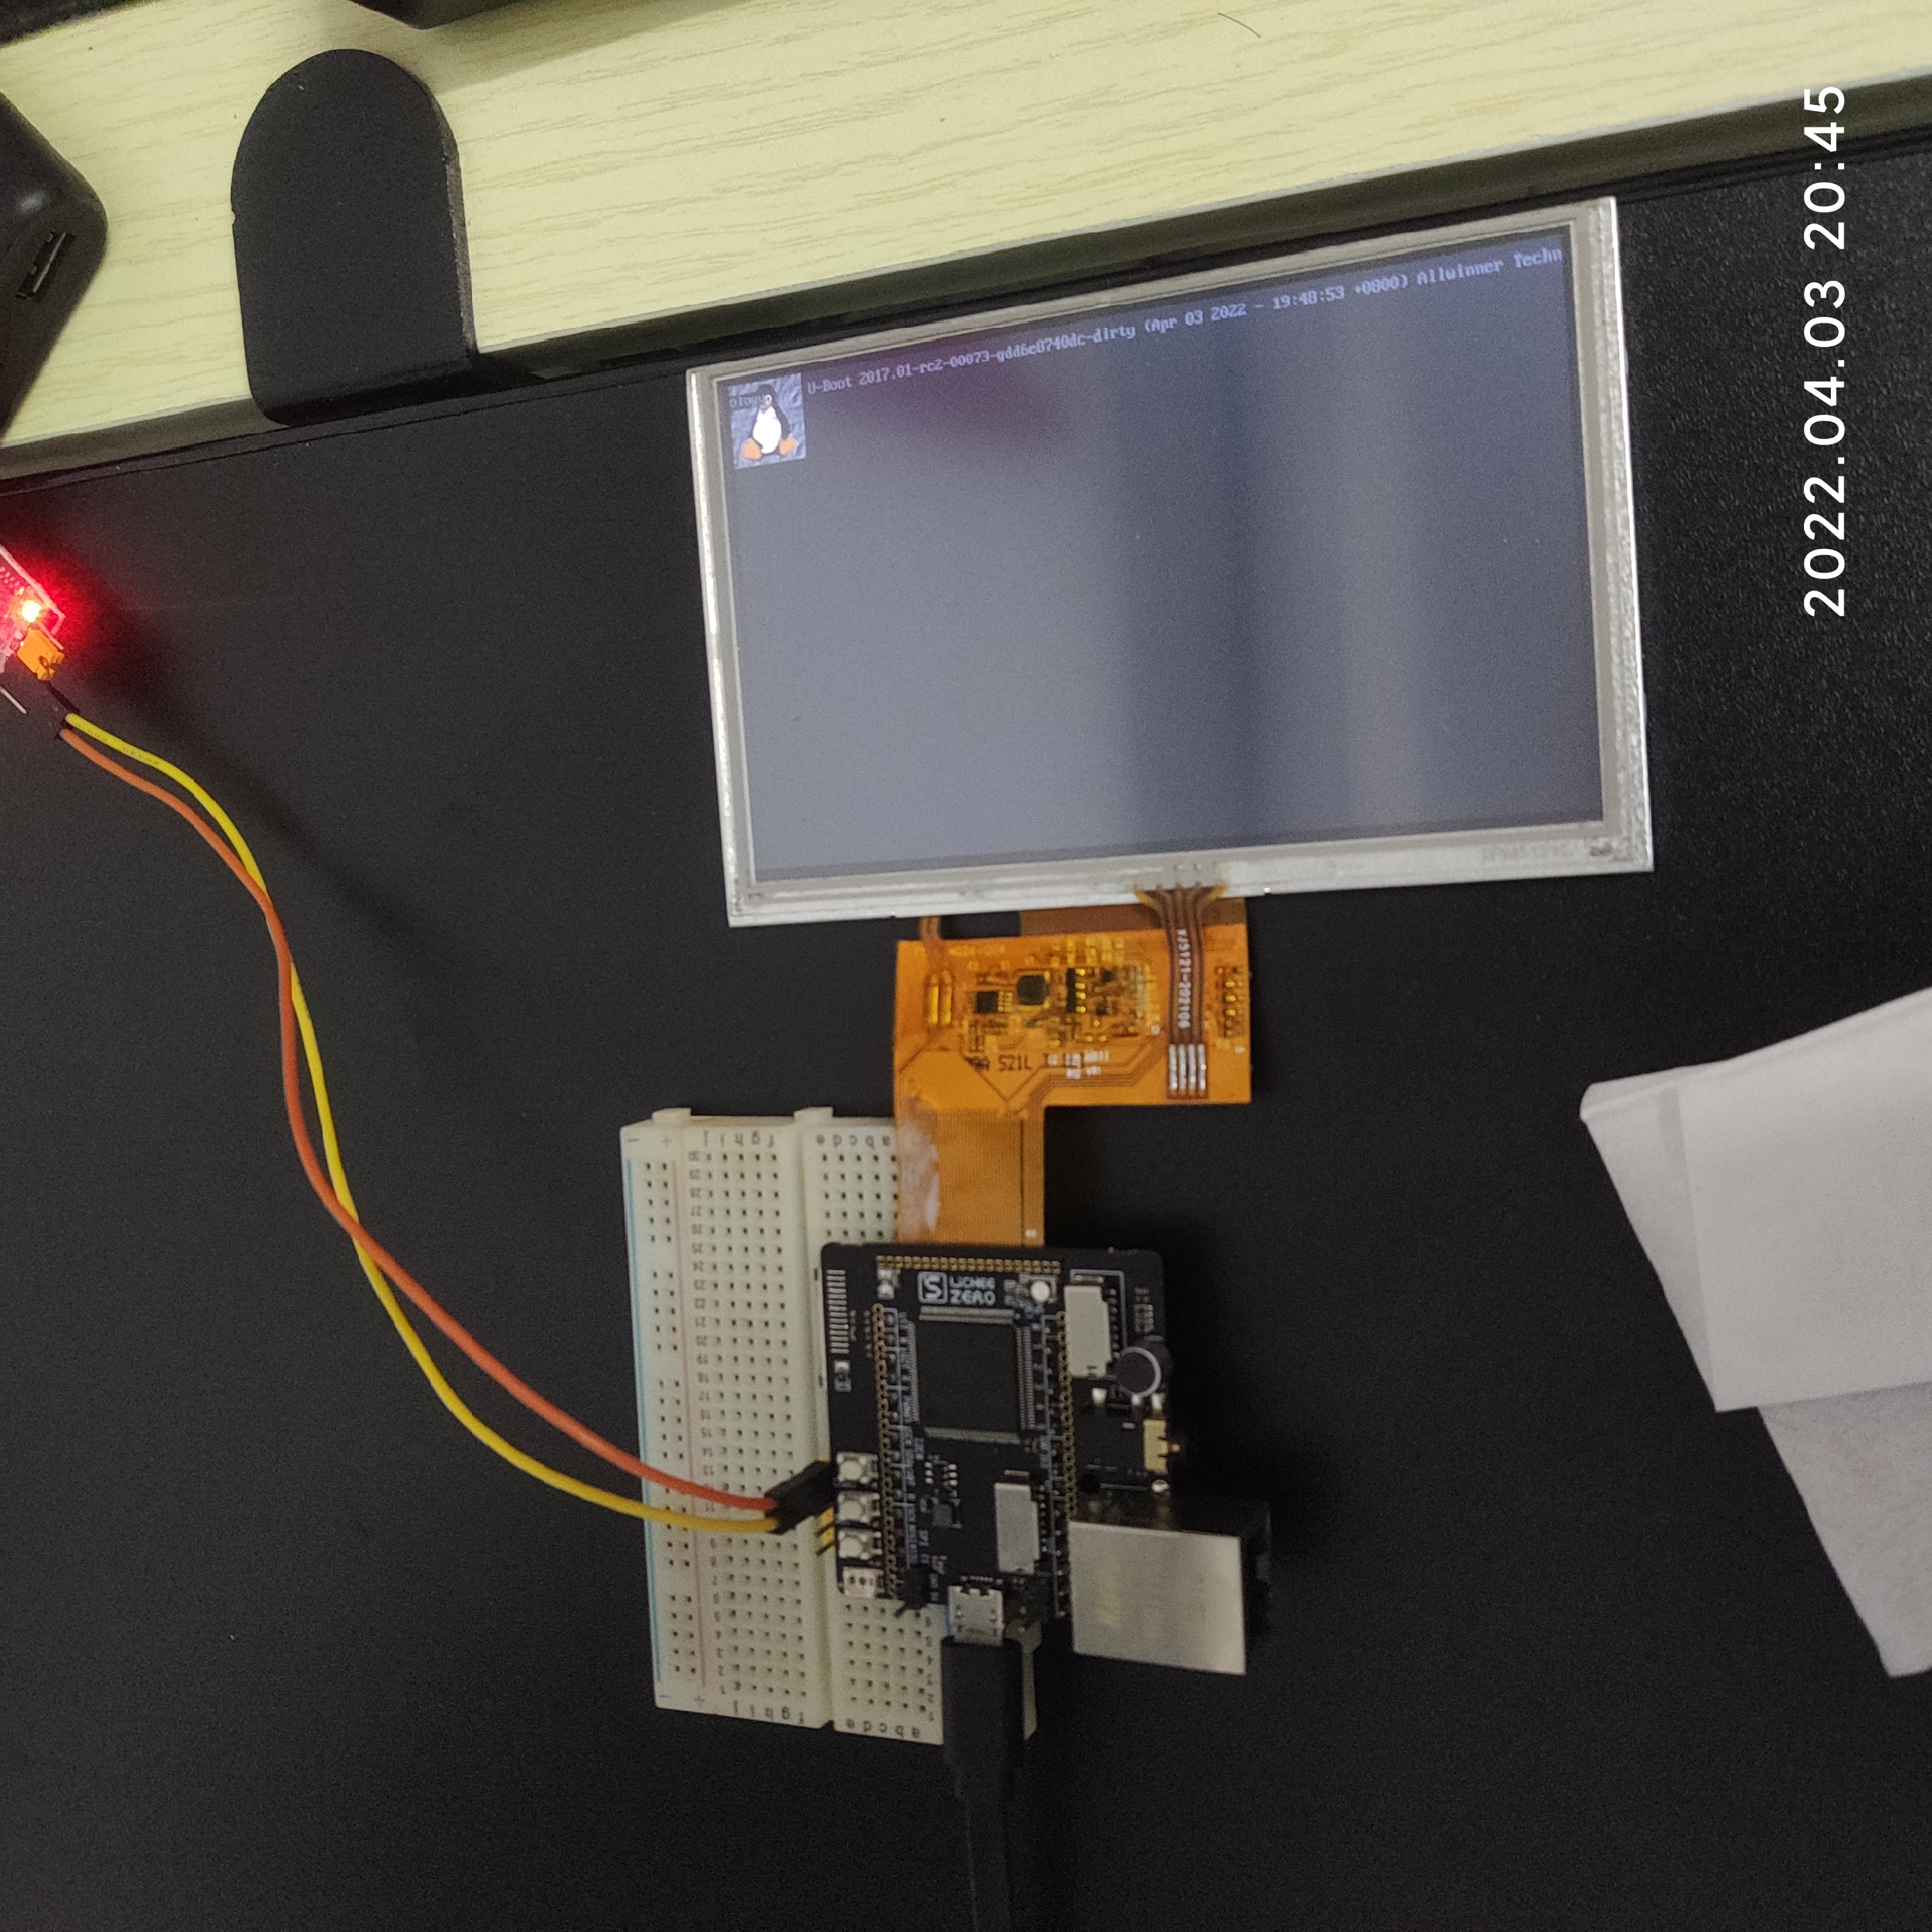
u-boot运行效果
附录
1 | sudo ln -s /opt/工具 /usr/local/bin/工具 # 将opt目录下指定的文件 软连接到 /usr/local/bin/文件 中(创建快捷方式) |